SPF, DKIM and DMARC Setup: A Plain-English Guide for Small Businesses
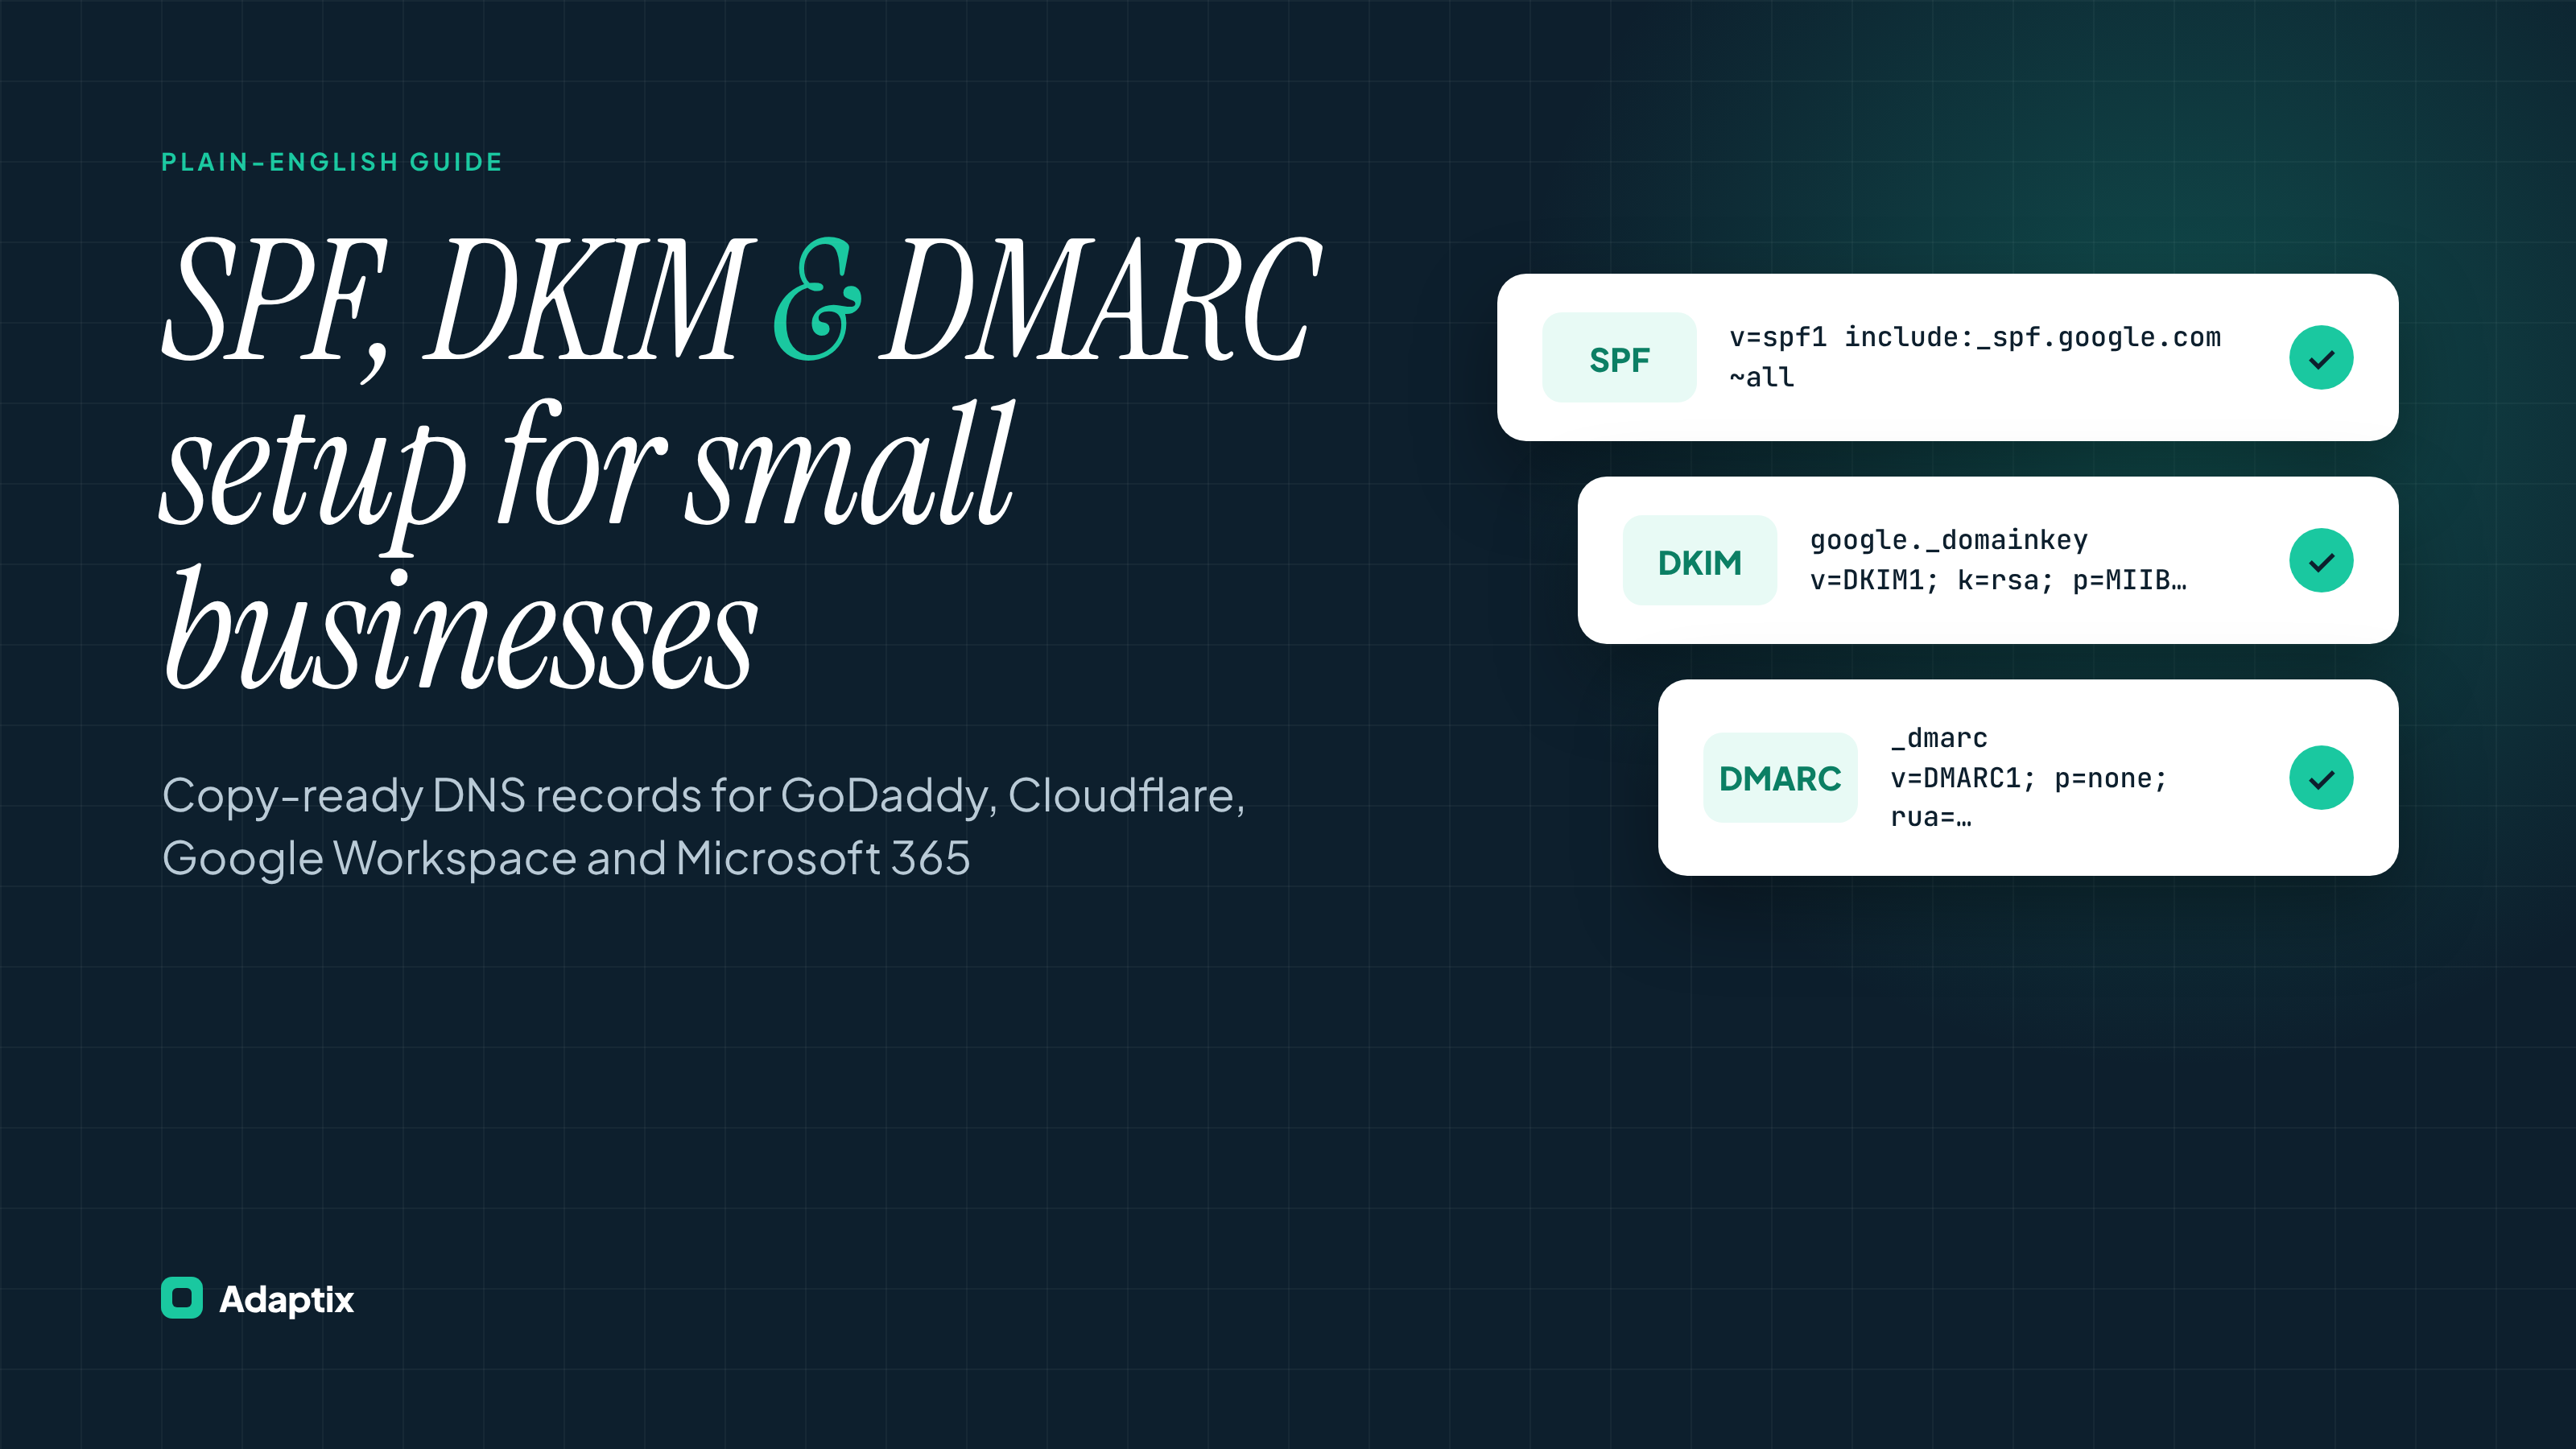
If your emails keep landing in spam, or a customer has ever asked “did you really send this?”, the fix usually starts in your DNS settings. Three short text records, SPF, DKIM and DMARC, tell inbox providers that mail from your domain really came from you. A complete SPF, DKIM and DMARC setup takes about an hour of hands-on work. Most of the rest is waiting for DNS to update.
In our earlier post on email authentication [LINK: earlier Adaptix email authentication post], we covered why these records matter. This guide is the hands-on follow-up. You will get copy-ready DNS examples for the four setups we see most often with small businesses: GoDaddy, Cloudflare, Google Workspace and Microsoft 365. Swap in your own domain, paste, save and test.
Why this matters more now
Gmail and Yahoo started enforcing sender requirements in February 2024. Microsoft followed in May 2025 for Outlook.com, Hotmail and Live addresses. Any domain sending 5,000 or more messages a day to those providers must pass SPF and DKIM and publish a DMARC record, or its mail gets filtered or refused.
If you send fewer than 5,000 a day, you are still judged by the same signals. You just get less warning. A bakery sending a monthly newsletter to 1,200 customers looks a lot more trustworthy to Gmail with all three records in place, and a lot less trustworthy without them.
The three records in plain English
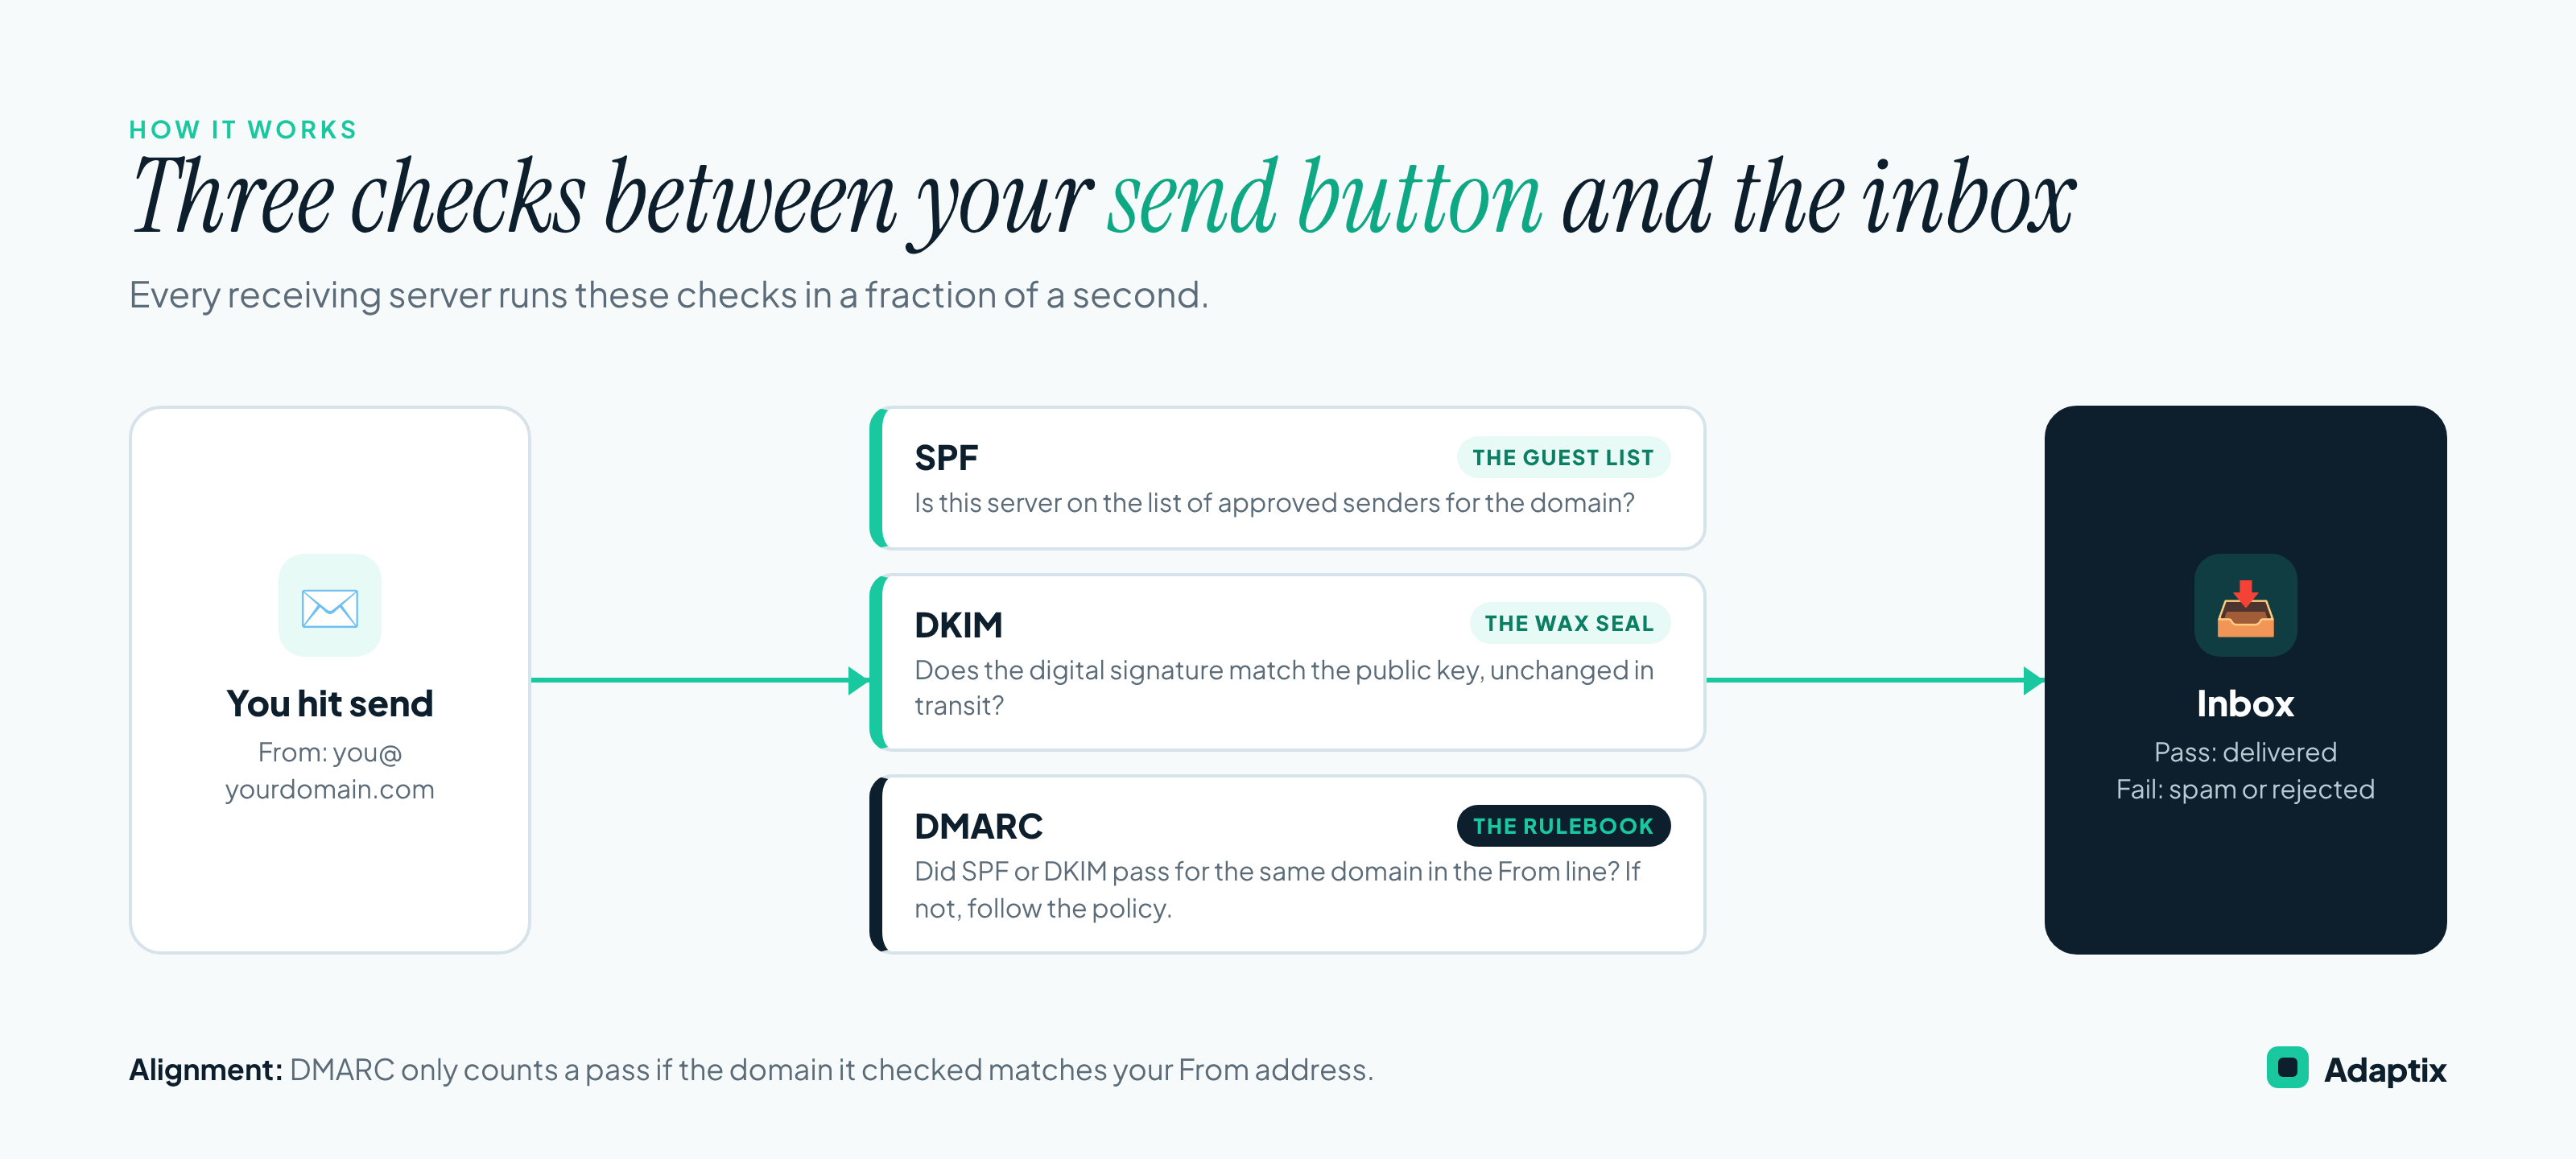
- SPF (Sender Policy Framework) is your guest list. It names the servers and services allowed to send email for your domain.
- DKIM (DomainKeys Identified Mail) is your wax seal. Your mail server signs each message, and the receiving server checks that signature against a public key in your DNS. If anyone changed the message on the way, the seal breaks.
- DMARC (Domain-based Message Authentication, Reporting and Conformance) is your rulebook. It tells receiving servers what to do when a message fails, and it sends you reports showing who is sending mail as your domain.
One detail trips people up: alignment. DMARC only counts a pass when the domain SPF or DKIM checked matches the domain in your From line. A marketing platform that signs with its own domain instead of yours can pass DKIM and still fail DMARC. That is why connecting your sending platform to your own domain matters.
Before you start: a 10-minute checklist
- Find your DNS host. This is wherever your nameservers point, which is not always where you bought the domain. If you bought it at GoDaddy but moved DNS to Cloudflare, you make every change in Cloudflare.
- List every service that sends email as your domain. Your mailbox provider, your email marketing platform, your CRM, invoicing tools like QuickBooks, website contact forms and your help desk. Missing one here is the most common reason setups break later.
- Get admin access to Google Workspace or Microsoft 365. You need it to generate DKIM keys.
- Pick a reporting address for DMARC, such as dmarc@yourdomain.com. Reports arrive daily, so a dedicated inbox keeps them out of your way.
Step 1: Set up your SPF record
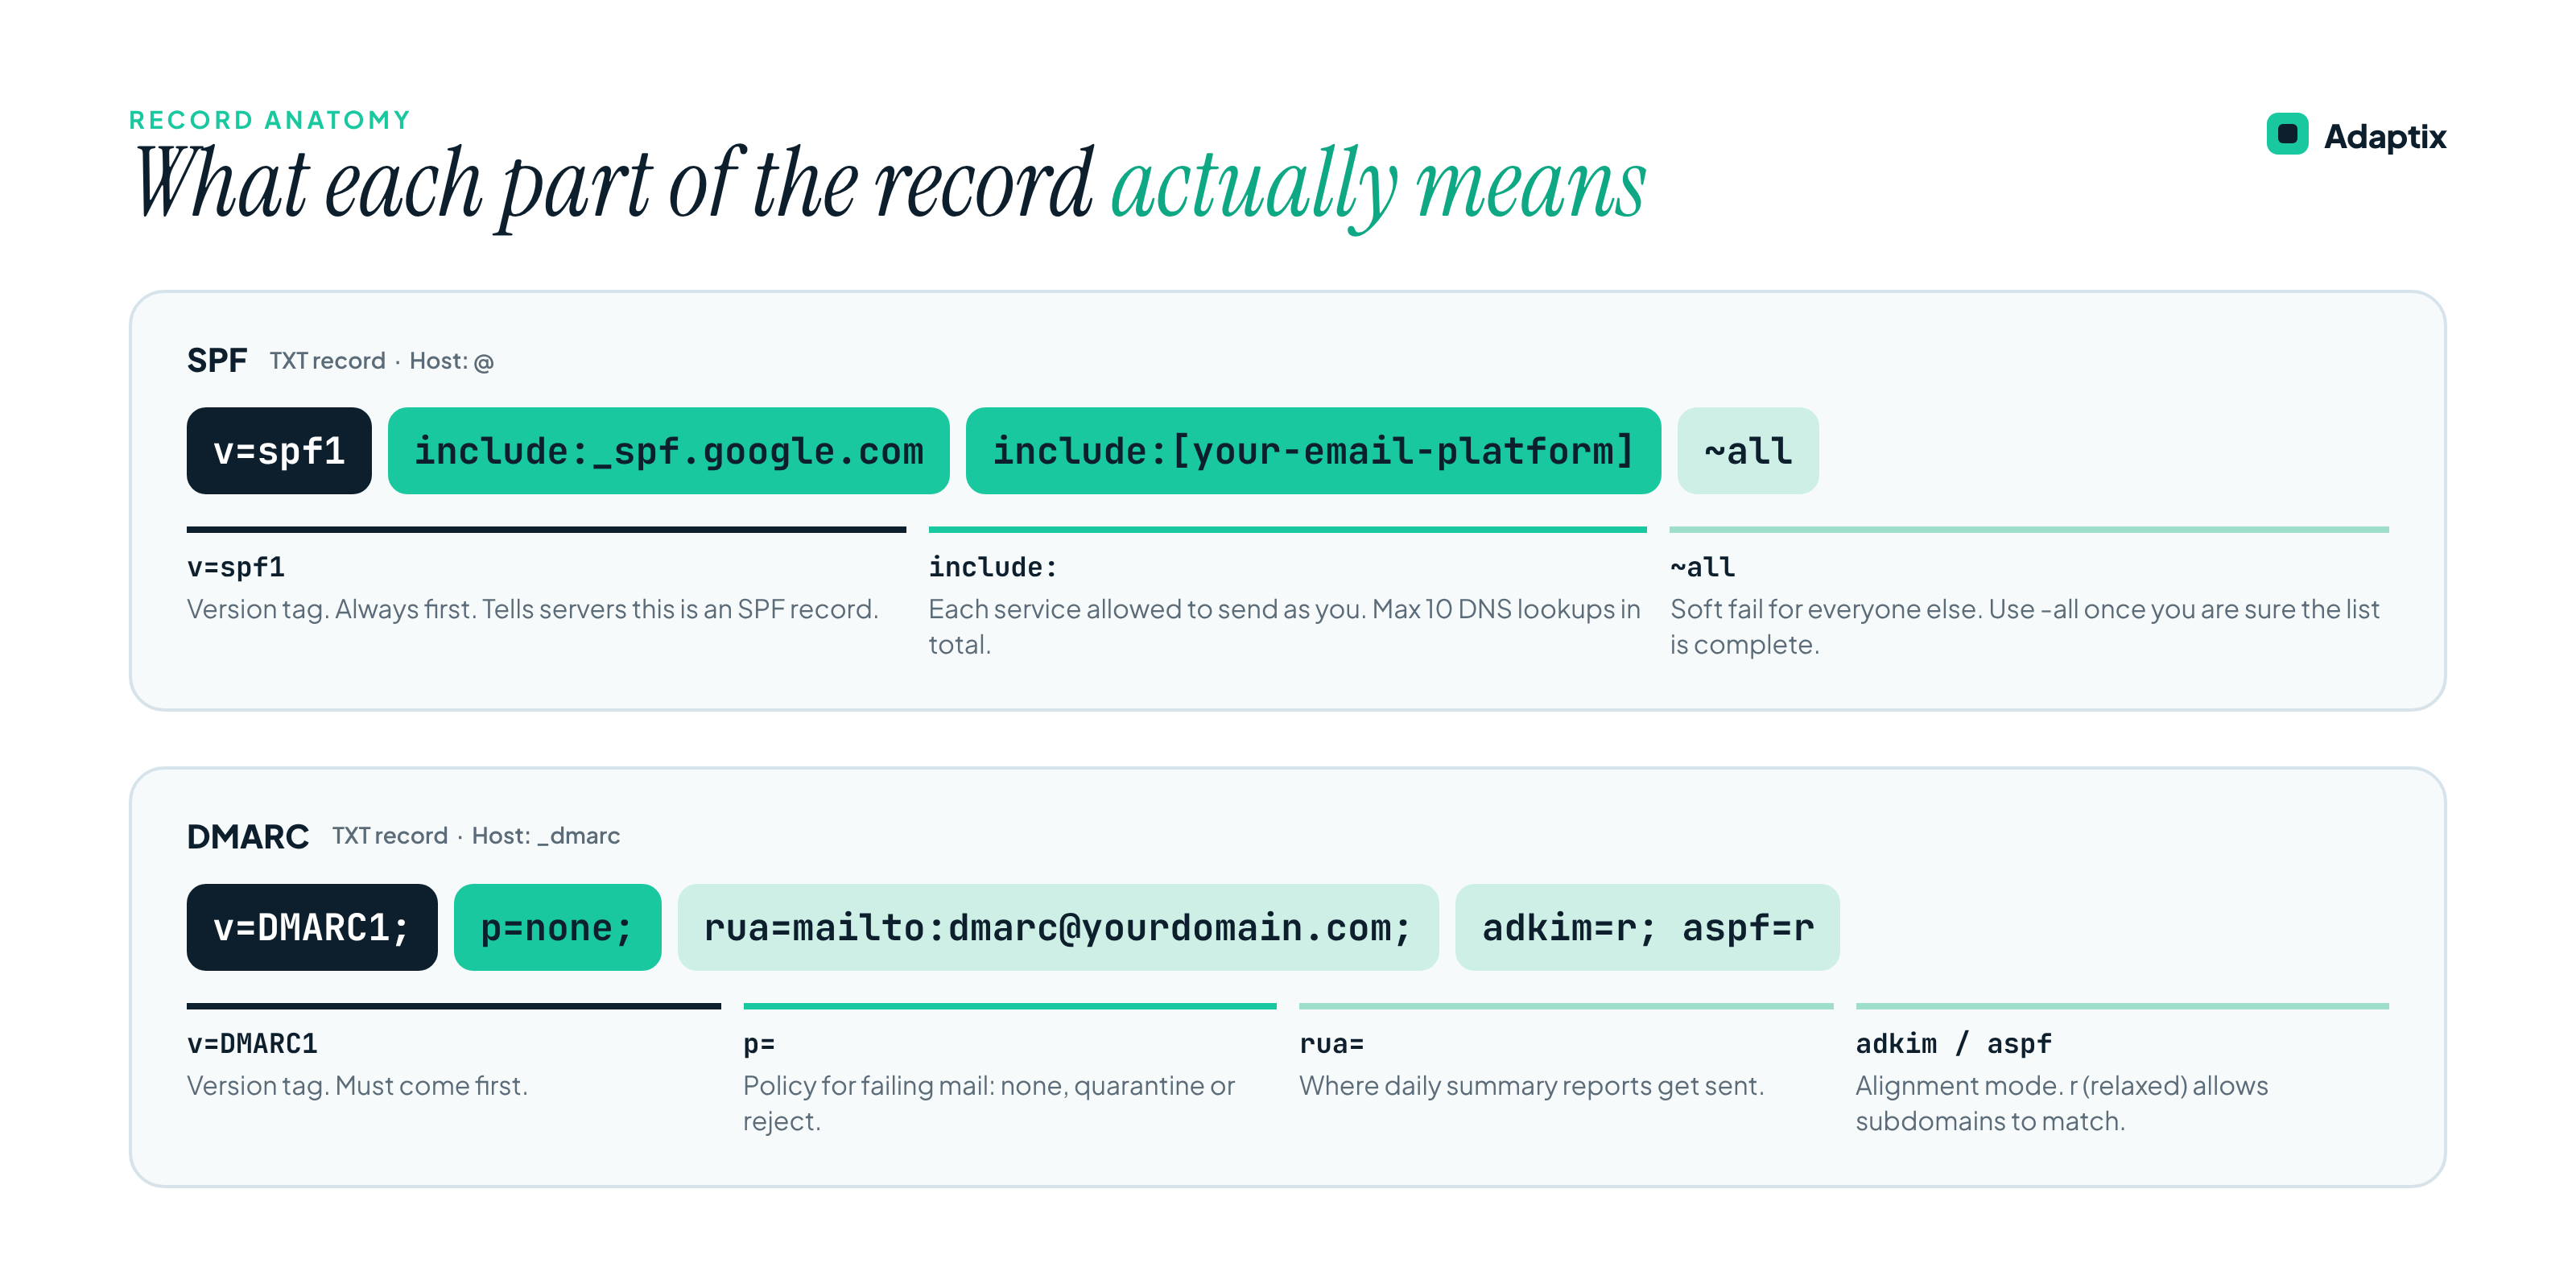
SPF lives in a single TXT record at the root of your domain. Two rules matter more than anything else:
- One SPF record per domain. If you have two records that start with v=spf1, both fail. Add new services to the existing record instead of creating a second one.
- Ten DNS lookups maximum. Every include: counts toward that limit, and some includes contain their own. Remove services you no longer use.
Google Workspace only
Type | Host / Name | Value |
TXT | @ | v=spf1 include:_spf.google.com ~all |
Microsoft 365 only
Type | Host / Name | Value |
TXT | @ | v=spf1 include:spf.protection.outlook.com ~all |
Mailbox plus an email marketing platform
Type | Host / Name | Value |
TXT | @ | v=spf1 include:_spf.google.com include:[your-email-platform-spf] ~all |
Replace the bracketed value with the include your platform lists in its domain settings. Swap _spf.google.com for spf.protection.outlook.com if you use Microsoft 365.
About ~all vs -all: ~all is a soft fail, which marks unlisted senders as suspicious. -all is a hard fail. Start with ~all. Once your DMARC reports confirm every real sender is covered, you can tighten it.
Step 2: Set up DKIM
DKIM keys are generated by your email provider, not written by hand. You copy what the provider gives you into DNS, then switch signing on.
Google Workspace DKIM
- In the Google Admin console, go to Apps > Google Workspace > Gmail > Authenticate email.
- Select your domain and click Generate new record. Choose a 2048-bit key and keep the default selector, google.
- Copy the TXT record value Google displays and add it at your DNS host.
- Wait for DNS to update, then return to the same screen and click Start authentication.
Type | Host / Name | Value |
TXT | google._domainkey | v=DKIM1; k=rsa; p=MIIBIjANBgkqh… (paste the full key from Google) |
A 2048-bit key is long. Some DNS hosts split it into quoted chunks inside one record, which is fine. Never split it into separate records.
Microsoft 365 DKIM
Microsoft uses two CNAME records instead of a TXT key, and it rotates between them. Publish both.
- Open the Microsoft Defender portal and go to Email & collaboration > Policies & rules > Threat policies > Email authentication settings > DKIM.
- Select your custom domain. Microsoft shows the two CNAME values for your tenant.
- Add both CNAMEs at your DNS host, wait for them to resolve, then toggle Sign messages for this domain with DKIM signatures to Enabled.
Type | Host / Name | Value |
CNAME | selector1._domainkey | selector1-yourdomain-com._domainkey.yourtenant.x-v1.dkim.mail.microsoft |
CNAME | selector2._domainkey | selector2-yourdomain-com._domainkey.yourtenant.x-v1.dkim.mail.microsoft |
Copy the exact values from your own tenant. The letter before -v1 changes from account to account, and newer domains end in .dkim.mail.microsoft with no .com. That looks wrong, but it is correct. Do not add .com to it. Older tenants may show targets ending in .onmicrosoft.com, which also work.
Your email marketing platform
Your sending platform will give you its own DKIM records, usually two or three CNAMEs, in its domain settings. Add them the same way. This is what lets campaign email align with your domain and pass DMARC.
Step 3: Set up DMARC
DMARC is one TXT record at _dmarc. Start in monitoring mode so nothing gets blocked while you learn who is sending as you.
Type | Host / Name | Value |
TXT | _dmarc | v=DMARC1; p=none; rua=mailto:dmarc@yourdomain.com; adkim=r; aspf=r |
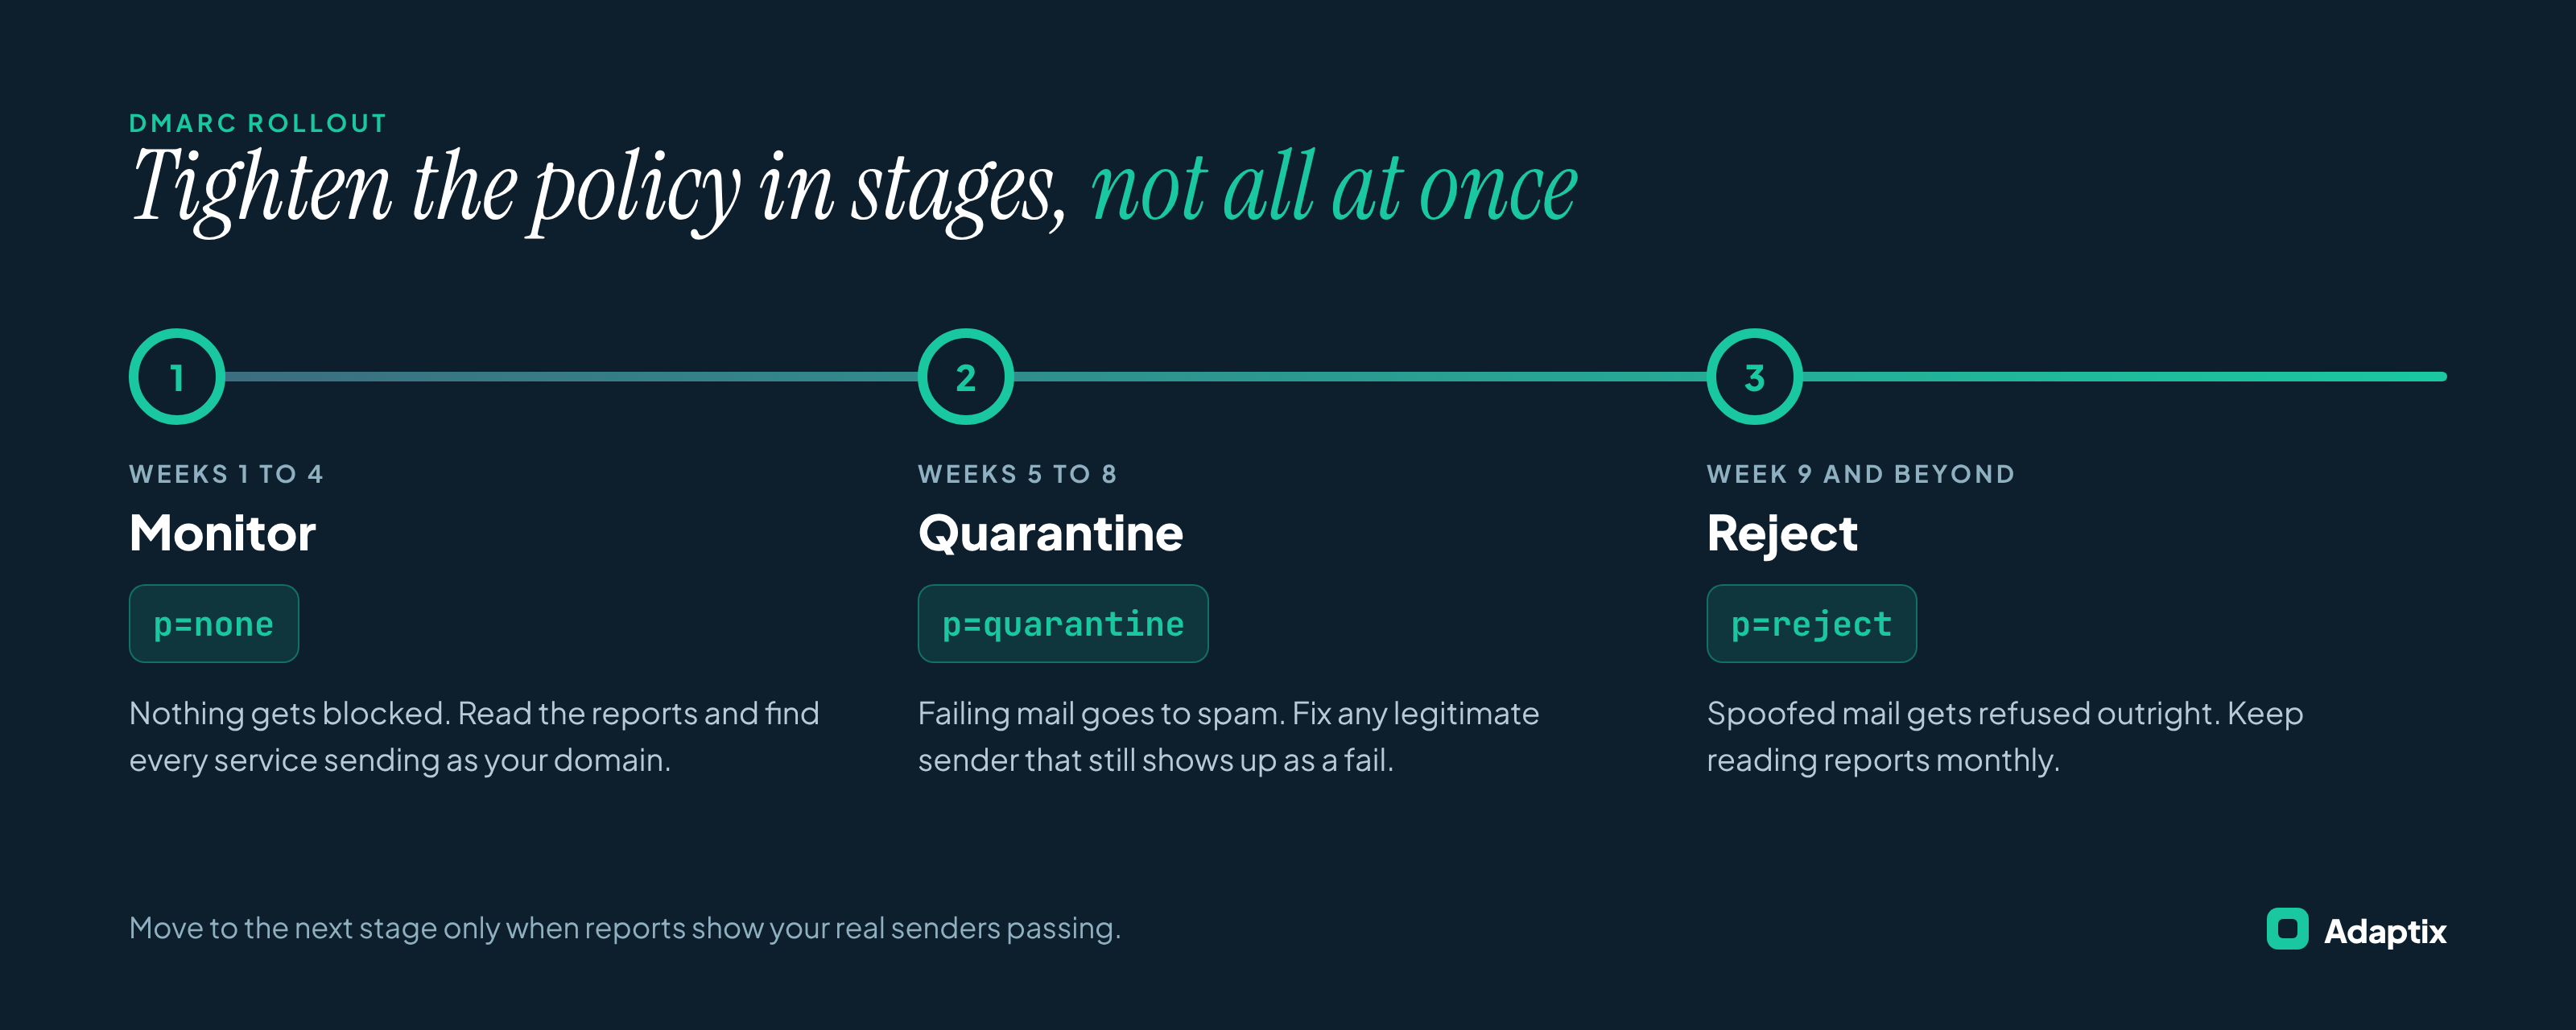
After a few weeks of clean reports, tighten the policy one step at a time:
Type | Host / Name | Value |
TXT | _dmarc | v=DMARC1; p=quarantine; rua=mailto:dmarc@yourdomain.com; adkim=r; aspf=r |
TXT | _dmarc | v=DMARC1; p=reject; rua=mailto:dmarc@yourdomain.com; adkim=r; aspf=r |
Replace the existing _dmarc record each time. Only one should exist.
Raw DMARC reports arrive as XML files, which are not fun to read. A free report viewer turns them into a simple list of senders with pass or fail results. If you use Cloudflare, its free DMARC Management tool does this inside your dashboard.
Adding the records at your DNS host
GoDaddy
- Sign in and go to My Products, find your domain and open DNS (Manage DNS).
- Click Add New Record, choose the type (TXT or CNAME), and fill in Name and Value.
- Use @ as the Name for SPF, _dmarc for DMARC and _domainkey or selector1._domainkey for DKIM. GoDaddy adds your domain automatically, so do not type it.
- Leave TTL at the default (1 hour) and save.
Watch for: an existing SPF record. If you ever used GoDaddy email, you may already have v=spf1 include:secureserver.net -all. Edit that record rather than adding a second one, and remove include:secureserver.net if you no longer use GoDaddy mail.
Cloudflare
- Open your domain in the Cloudflare dashboard and go to DNS > Records.
- Click Add record, choose the type and enter the Name and Content.
- Use @ for SPF, _dmarc for DMARC and the selector name for DKIM. TTL can stay on Auto.
- For every DKIM CNAME, set Proxy status to DNS only (grey cloud).
Watch for: the orange cloud. A proxied DKIM CNAME points to Cloudflare instead of your email provider, and DKIM fails. TXT records cannot be proxied, so SPF and DMARC are safe.
Quick reference: every record in one table
Record | Type | Host / Name | Google Workspace | Microsoft 365 |
SPF | TXT | @ | v=spf1 include:_spf.google.com ~all | v=spf1 include:spf.protection.outlook.com ~all |
DKIM | TXT / CNAME | google._domainkey or selector1/2._domainkey | TXT key from Admin console | Two CNAMEs from Defender portal |
DMARC | TXT | _dmarc | v=DMARC1; p=none; rua=mailto:dmarc@yourdomain.com | Same as Google Workspace |
How to test your setup
Most DNS changes show up within minutes, though some take up to 48 hours. Once they do:
- Send a message from your domain to a personal Gmail address.
- Open it, click the three-dot menu and choose Show original.
- Look for SPF: PASS, DKIM: PASS and DMARC: PASS near the top.
- Repeat with a test campaign from your marketing platform, since it sends from different servers than your mailbox.
Free lookup tools like MXToolbox will also confirm each record is published and readable.
Six mistakes we see all the time
- Two SPF records. Merge them into one.
- Typing the full domain in the Host field. Most hosts add it for you, which creates yourdomain.com.yourdomain.com.
- Proxying DKIM CNAMEs on Cloudflare. Switch them to DNS only.
- Publishing only one Microsoft 365 selector. DKIM works until Microsoft rotates keys, then it fails.
- Jumping straight to p=reject. You will block your own invoices or contact forms before you know they are failing.
- Forgetting a sender. That QuickBooks invoice tool or old contact form plugin will show up in your DMARC reports. Add it before you tighten the policy.
Frequently asked questions
Do I really need all three records?
Yes. SPF and DKIM prove who sent the message. DMARC ties them to your From address and tells receivers what to do when something fails. Each one covers a gap the others leave open.
Will DMARC break my email?
Not at p=none. That policy only collects reports. Problems happen when businesses move to quarantine or reject before every sender is authenticated, which is why the staged rollout matters.
How long does SPF, DKIM and DMARC setup take?
About an hour to add the records. Plan on eight or more weeks to move DMARC from monitoring to full enforcement.
Ready to send?
With SPF, DKIM and DMARC passing, your domain is ready for real campaigns. Adaptix gives you the DNS records for your sending domain when you connect it, so your campaign email aligns with your domain from the first send. Pair that with the automation workflows and list tools covered elsewhere on this blog, and your email has a much better shot at reaching the inbox.
FAQs
A brand kit for email marketing is a centralized set of brand assets and rules – logos, colors, fonts, CTA styling, sender identity, and tone of voice – connected directly to your marketing automation platform so every campaign applies them automatically.
A style guide is a document that describes your brand. A brand kit is an operational asset that enforces it. The style guide tells someone what the rules are; the brand kit applies them automatically when a campaign is built.
Yes, indirectly but meaningfully. Recognizable sender identity drives higher open rates and lower spam complaints. Mailbox providers use those engagement signals to decide inbox placement, so inconsistent branding can degrade your sender reputation over time.
At minimum: logo variations including an SVG for BIMI, exact color values, email-safe typography with fallbacks, button and CTA styling, sender name and reply-to conventions, footer and legal blocks, and tone of voice rules.
BIMI requires a properly formatted SVG logo and a Verified Mark Certificate to display your logo beside your emails. A brand kit ensures you have a single canonical logo file in the correct format, which is a prerequisite for BIMI implementation.
Small businesses often benefit more. With fewer people and less design support, a brand kit lets non-designers produce on-brand campaigns without a review bottleneck.
For most businesses with existing assets, a working brand kit takes a few days to assemble. The time-consuming part is usually settling internal disagreements about which version of an asset is correct, not the assembly itself.
Customer Journey Marketing Automation: A Practical Guide for SMB Owners
Most small business owners run automation backwards. They buy the tool, build a few email sequences, and hope the results follow. Then they wonder why open rates sag and leads go cold.
The businesses that get real returns from automation start somewhere else entirely. They start with the customer journey. They map how a stranger becomes a buyer, and they build automation around that path instead of forcing customers into whatever the software makes easy.
This guide walks through how customer journey marketing automation actually works, why the journey has to come first, and how a service-based small business can put it into practice without a marketing team.
What Is Customer Journey Marketing Automation?
Customer journey marketing automation is the practice of using software to deliver the right message at the right moment based on where a person sits in their relationship with your business.
Break that into its two parts and it gets clearer.
The customer journey is the full path a person travels from the first time they hear your name to the moment they buy, and often well past that into repeat business and referrals. Every business has one whether or not anyone has written it down.
Marketing automation is the software layer that responds to that journey automatically. When someone downloads your guide, books a call, or abandons a checkout, automation notices and reacts without you touching a keyboard.
Put them together and you get a system that meets people where they are. A first-time visitor gets a welcome. A warm lead who has read three of your pages gets a nudge toward a call. A past customer gets a check-in. Same business, different messages, all triggered by behavior instead of a calendar.
Why the Journey Has to Come Before the Automation
Here is where most SMBs go wrong. They treat automation as a content problem. Write enough emails, schedule them, done.
But automation without a journey map is just a faster way to send irrelevant messages. Speed does not fix relevance. If your welcome email pitches your premium package to someone who barely knows what you do, automation only helps you lose them quicker.
Think about how a good salesperson works a room. They read the person in front of them. They know the difference between someone kicking tires and someone reaching for a credit card, and they say different things to each. The journey map gives your automation that same awareness. Without it, every contact gets the same pitch regardless of readiness.
Map first. Automate second. That order is the whole game.
The Five Stages of a Customer Journey
Journeys vary by business, but most service-based SMBs can work from five stages. Use these as a starting frame and adjust to fit how people actually buy from you.
1. Awareness
The person has a problem and is starting to look for answers. They may have found a blog post, a social clip, or a referral from a friend. They do not know you yet, and they are not ready to be sold to.
What they need: helpful information that builds trust. What automation does here: captures the contact and delivers a light welcome that sets expectations without pushing.
2. Consideration
Now they are weighing options, including yours. They are reading case studies, comparing providers, and trying to figure out whether you can actually solve their problem.
What they need: proof and specifics. What automation does here: sends targeted content based on what they have engaged with, such as a comparison guide or a relevant customer story.
3. Decision
They are close. They have narrowed the field and are looking for a reason to commit or a reason to walk.
What they need: a clear, low-friction next step. What automation does here: delivers a booking link, a limited offer, or a straightforward answer to the objection that usually stalls deals at this stage.
4. Retention
They bought. Most businesses stop here, which is a mistake, because keeping a customer costs far less than winning a new one.
What they need: to feel good about the choice they made. What automation does here: onboards them cleanly, checks in at the right moments, and surfaces the next thing they might need.
5. Advocacy
A happy customer is your cheapest and most credible marketing channel. This stage turns satisfaction into referrals and reviews.
What they need: an easy way to spread the word. What automation does here: asks for a review at the peak of satisfaction and invites referrals when the timing is natural.
How to Map Your Own Customer Journey
You do not need software or a consultant to start. You need a whiteboard, an hour, and honesty about how people actually buy from you.
Start at the sale and work backward. Pick a recent customer you know well. How did they find you? What made them trust you? What almost stopped them? Retracing one real path teaches you more than any template.
Write down every touchpoint. List each moment a person interacts with your business, from the first ad to the thank-you note. Website visits, emails, calls, forms, invoices, follow-ups. This is your raw material.
Match each stage to a question the customer is asking. In awareness they ask “can this help me?” In decision they ask “why should I pick you?” Your automation exists to answer the question they are asking right now, not the one you wish they were asking.
Find the gaps and the friction. Where do people go quiet? Where do leads pile up and stall? Those dead spots are exactly where a well-placed automated message earns its keep.
Where Deliverability Fits In
Here is the part most automation guides skip, and it quietly undoes the whole system.
None of your journey mapping matters if your messages land in spam. You can build the sharpest sequence in the world, but if it never reaches the inbox, the customer never sees it and the journey breaks at every stage.
This is why deliverability belongs in the conversation from day one, not as an afterthought. Automated email volume grows fast, and mailbox providers scrutinize senders who ramp up quickly. Getting authentication right and keeping your sender reputation clean is what makes automation reliable instead of a source of silent losses. The best sequence is worthless if it sits in a junk folder.
Common Mistakes SMBs Make with Journey Automation
A few patterns show up again and again. Watching for them saves months of wasted effort.
Automating everything at once. Trying to build all five stages on day one usually means building none of them well. Pick the single stage where you lose the most people and start there.
Confusing activity with progress. Sending more email is not the same as moving people forward. If a message does not help the customer take their next real step, it is noise.
Setting it and forgetting it. Automation is not a slow cooker. Journeys shift as your business and market change, and a sequence that worked last year can quietly rot. Review your flows on a schedule.
Ignoring the handoff to humans. Automation should tee up conversations, not replace them. The moment a lead is ready to talk, a real person should be able to step in without the customer feeling like they hit a wall.
Getting Started Without Overwhelming Yourself
You do not need a full system to see results. You need one working flow.
Pick the stage where you are losing the most people. For many service businesses that is the gap between a new lead and a booked call, where interest fades before anyone follows up. Build one automated sequence for that stage, get it landing in inboxes, and measure what changes. Once it works, add the next stage.
That is the whole approach. Map the journey, automate one piece at a time, and keep the messages relevant to where each person actually is.
Adaptix was built around this idea, pairing journey-based automation with deliverability-first infrastructure so the messages you send actually arrive. If you are ready to build automation that follows the customer instead of fighting them, that is a good place to start.
Frequently Asked Questions
What is customer journey marketing automation? It is the use of software to send the right marketing message at the right time based on where a person is in their relationship with your business, from first contact through purchase and beyond. It combines a mapped customer journey with automated messages triggered by customer behavior.
Why should the customer journey come before automation? Because automation only speeds up whatever message you send. Without a journey map, you send irrelevant messages faster. Mapping the journey first ensures each automated message matches what the customer actually needs at that moment.
What are the stages of a customer journey? Most service-based small businesses can work from five stages: awareness, consideration, decision, retention, and advocacy. Each stage reflects a different question the customer is asking and calls for a different automated response.
How do I start with marketing automation as a small business? Start with one stage, not the whole system. Identify where you lose the most people, build a single automated sequence for that stage, confirm it lands in inboxes, and expand once it works.
Why does email deliverability matter for automation? Automated sequences only work if they reach the inbox. As email volume grows, mailbox providers scrutinize senders more closely, so proper authentication and a clean sender reputation are what keep your automation reliable instead of quietly landing in spam.